Census Integration
Census is a Reverse ETL solution that makes it easy to pipe data from your data warehouse into downstream tools like Correlated. With our custom destination, you can pull pre-modeled data from your data warehouse directly into Correlated. Also, Census makes it possible for Correlated to smartly infer how your data is important and why it matters so that you can get started with more populated views throughout the Correlated product with limited configuration on your part.
To get started, here's what you should have:
- A Census Account
- Existing Data Sources that contain the data you want to connect
- A Correlated Account
It's helpful to have existing Models, but you can also connect Census to Correlated first to see what data we support before creating your Models.
Correlated accepts Account and User fields from Census
You can pipe data from Census to Correlated as long as that data describes either an Account or a User. We provide some default fields that you can sync, as well as custom fields.
Create a Correlated API Key
- Sign in to Correlated
- Click the Integrations tab in the left bar navigation
- Find the "Census" card and click Connect
- You'll be prompted to create a Census API key. Hit Create.
- Copy the API key displayed
Set up a Custom Destination in Census
Now, you're ready to set up a destination in Census.
- Navigate to the "Connections" tab on the left navigation
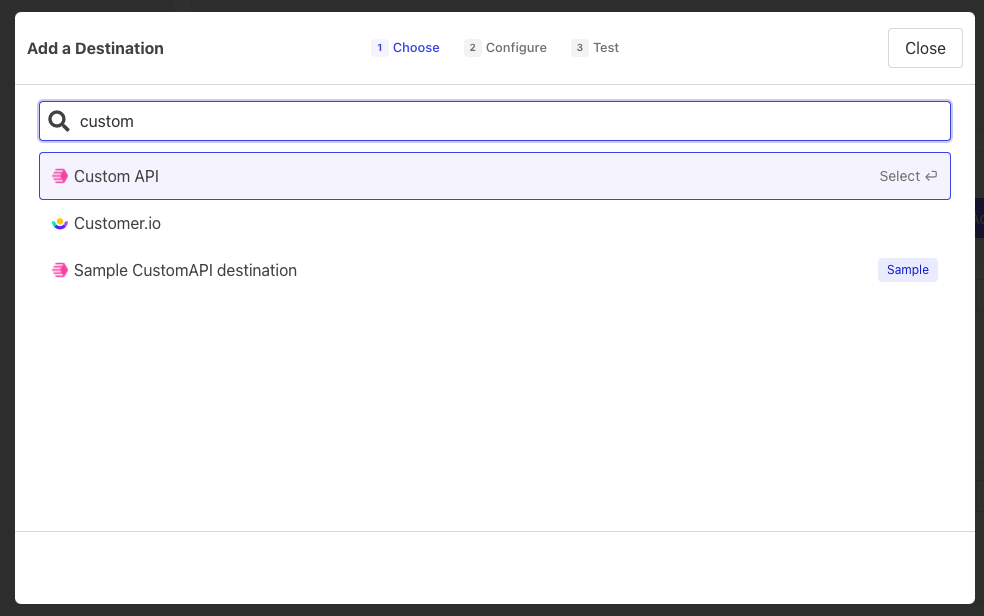
- Scroll down to the Service Connections section and click "Add Service"
- Select "Custom API"
- In the API URL input, append your API key to the following URL:
https://collector.getcorrelated.com/census/v1?census_authentication= - Hit "Connect" and test your connection

Create a Sync in Census to Pipe Data into Correlated
Note: The entire Census integration can be configured entirely in Census.
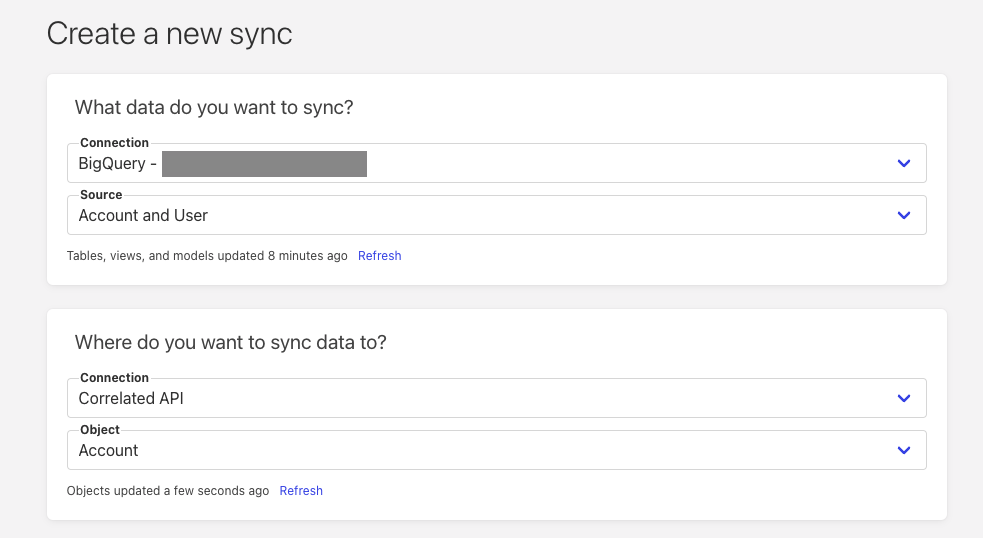
- Navigate to the "Syncs" tab in Census and add a Sync
- Select the Connection and Source that you want to sync to Correlated
- Select your Correlated Custom API connection as your data sync
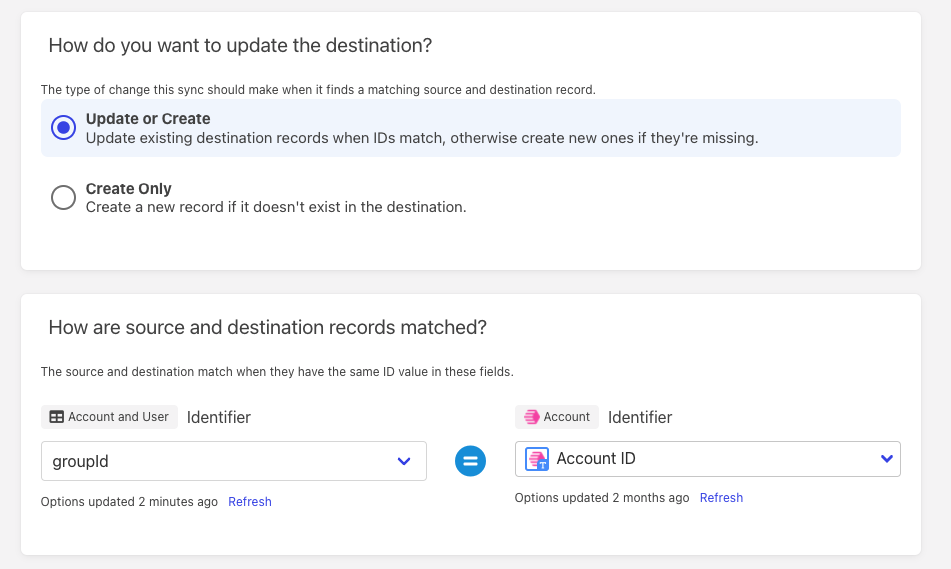
- Select the object type you want to sync to. Accounts must be identified with the same Account ID that you are using to identify Accounts in other data sources. Users must be identified with the same User ID that you are using to identify Users in other data sources.

- Continue to Follow the Prompts in Census
- Again, when prompted to select your Account ID or User ID, make sure this is the same ID you use to globally identify your customers across all data sources

- Now, you'll be able to tell Correlated what columns you want to import and how they are important to you. These will appear as Dimensions in Correlated. By default, you must provide a User ID and Email for User objects (note: the User ID may be an email) and an Account ID and Company Name for Account objects.
- You can also add additional mappings. Correlated offers a list of common fields by default, and you can also create custom fields!
- Next, hit run test
Dimensions:
Dimensions describe who the customers are - for example, how many seats they have, what region they are based in, how many employees they have, etc.
Adding Custom Fields
- By mapping your modeled data columns to existing Correlated fields, you'll be able to benefit from out-of-the-box views since we'll be able to leverage the context you are providing to show the most relevant views. However, you can add custom fields to fully customize your Correlated experience. As mentioned above, you can use this by selecting the "Custom" mapping
Updated over 3 years ago
