
Configuring Account Settings
Once all of your data sources and downstream applications have been connected and data is beginning to flow into Correlated, there's a few last steps to finish configuring your account.
Data Mapping
- In the left-hand navigation, click into the "Settings" tab.
- Open "Data mapping."

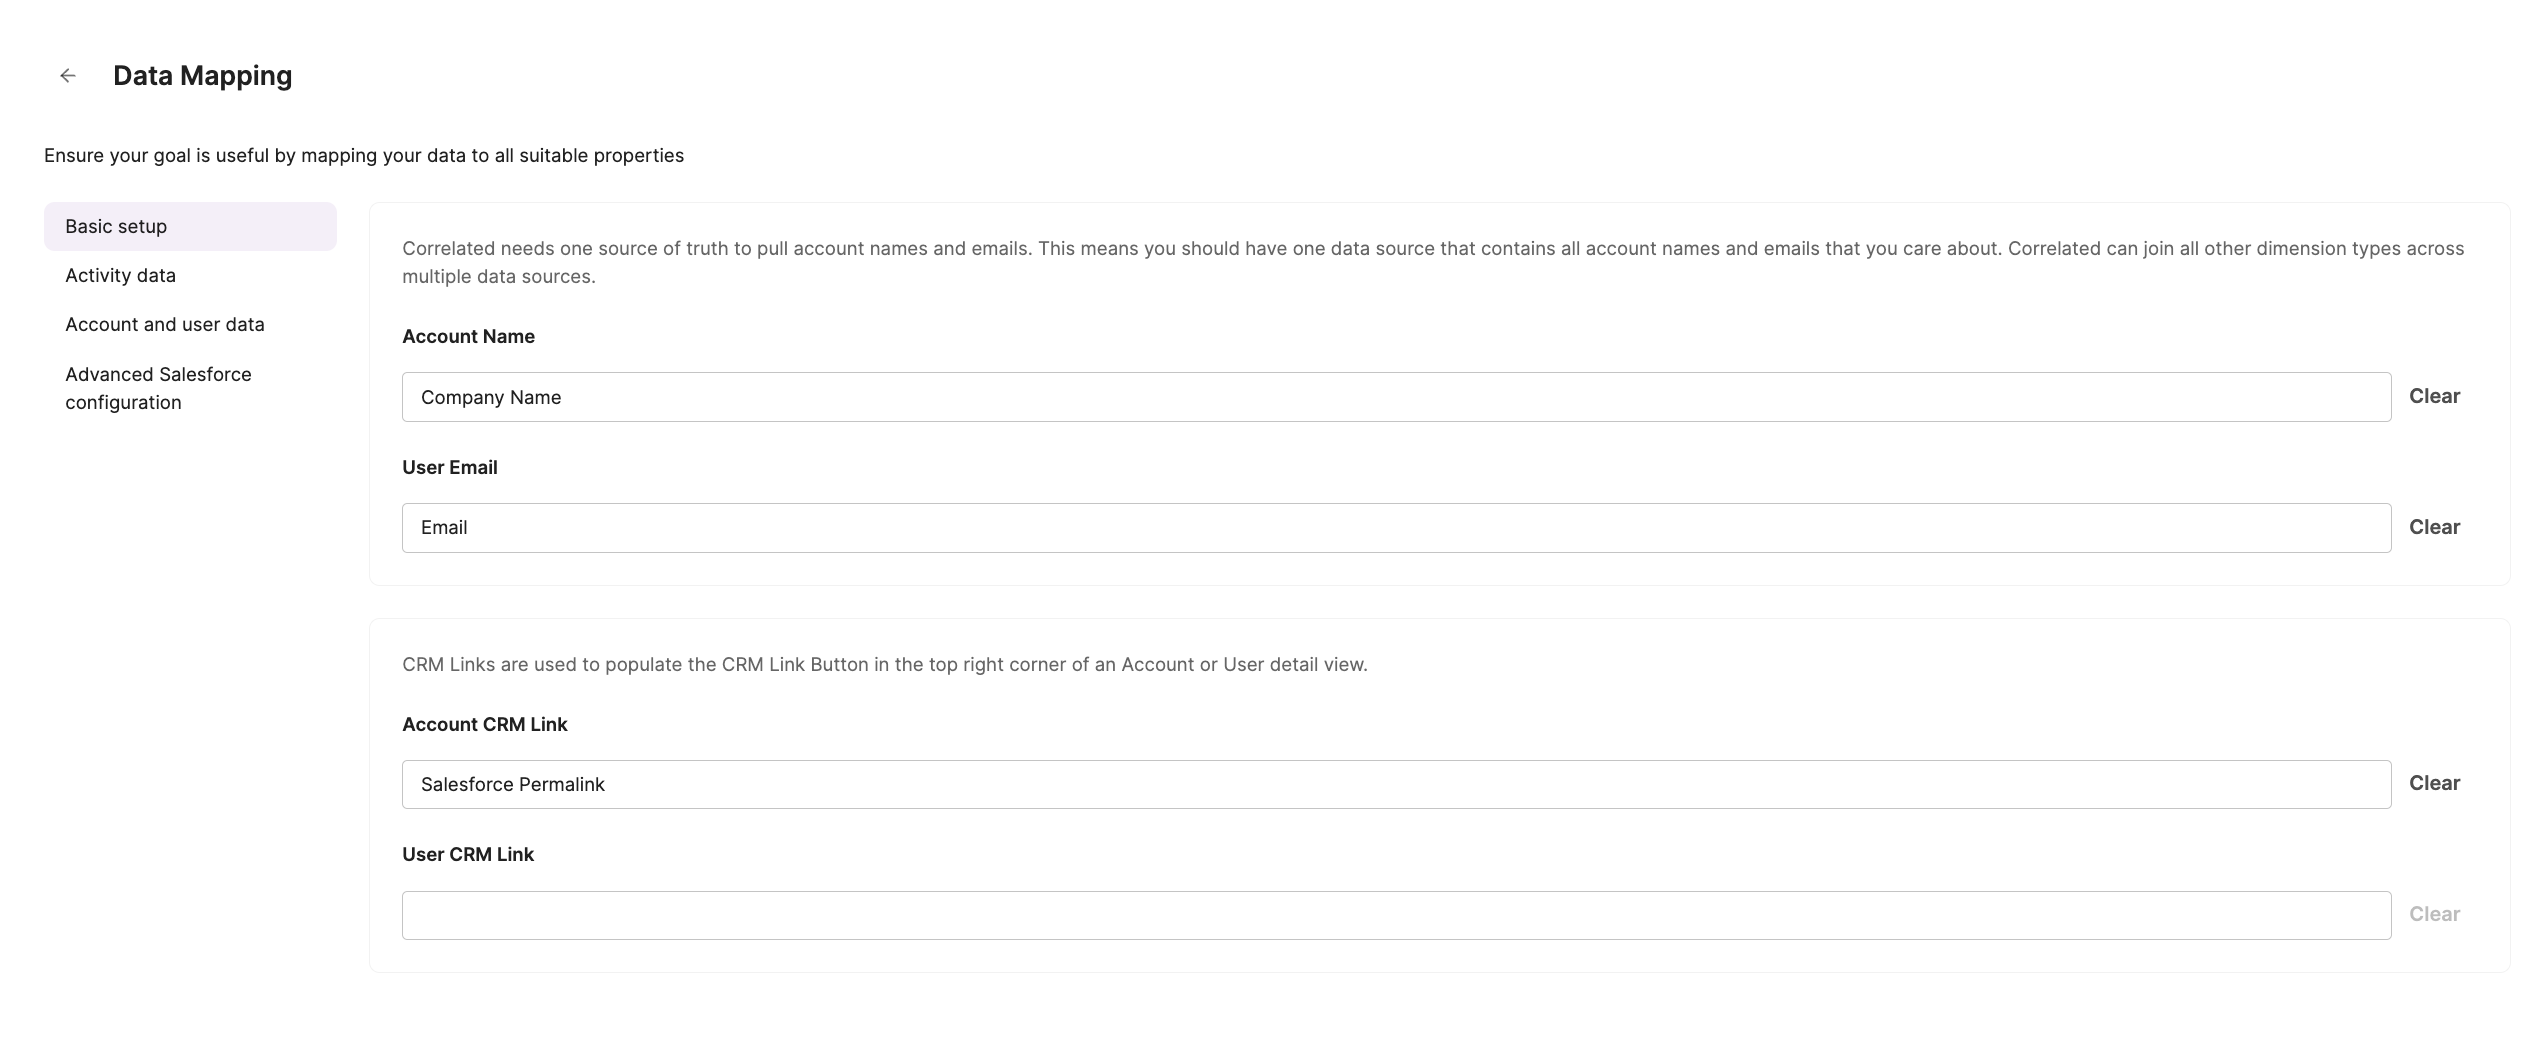
Basic Setup
- Under "Basic Setup" you'll need to assign Dimensions to identify Accounts and Users. We recommend using "Company" or "Account Name" for Accounts, and "Email Address" for Users. These tend to be the most human-readable options.
- You can also choose to add a Salesforce, HubSpot, or other CRM "permalink." This is optional, but will appear as a link when viewing Account / User details in Correlated, so you can easily be directed to their page in your CRM if needed.
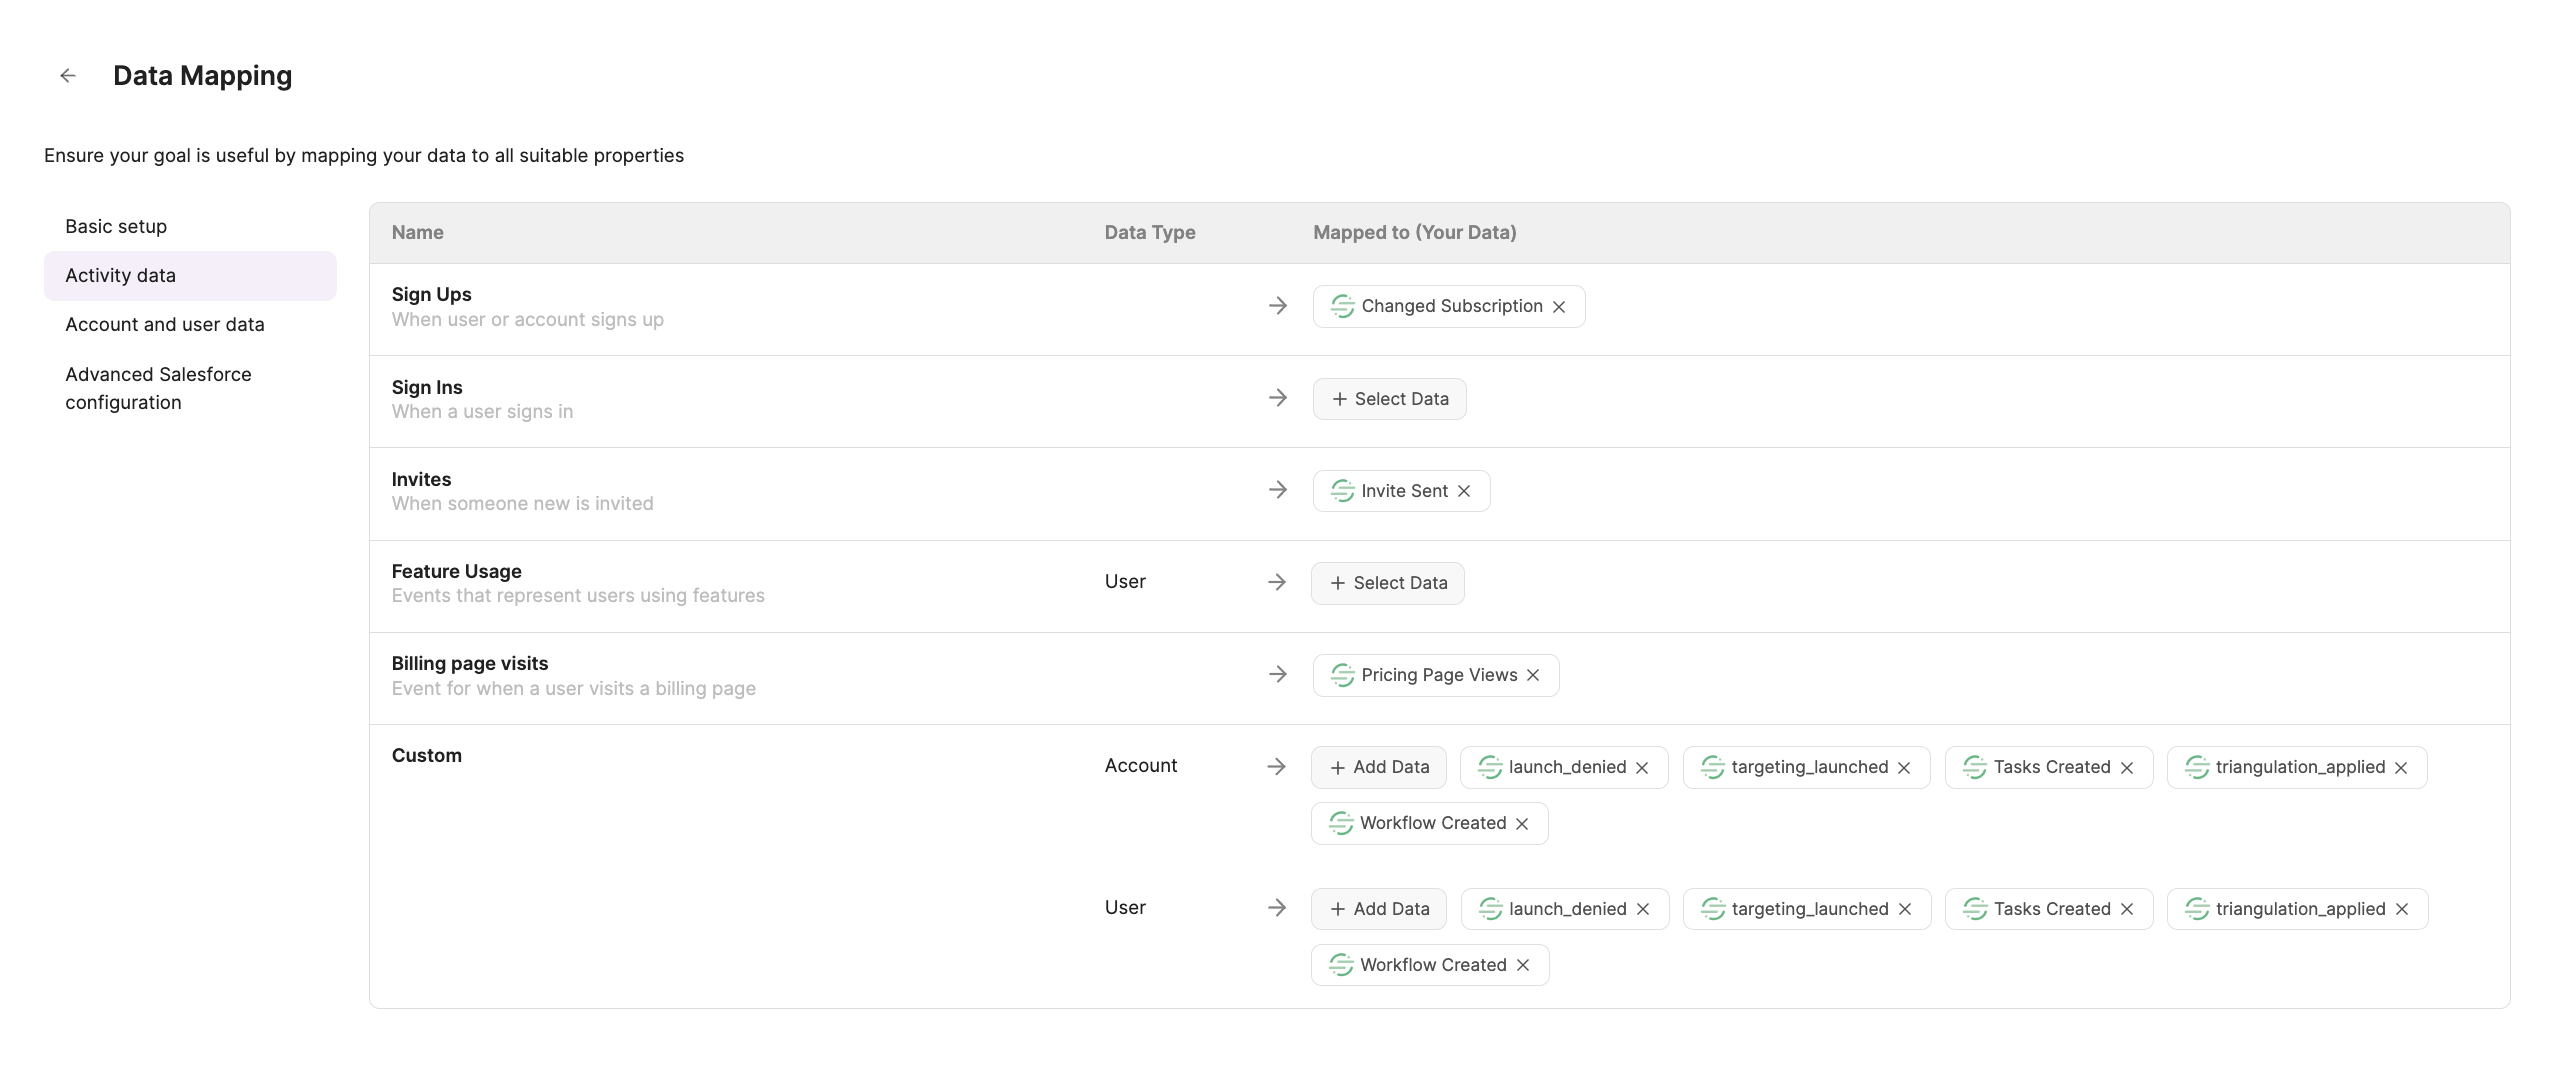
Activity Data
- Under "Activity Data" is where you can map any Metrics (ie events) from a data source like Segment, Amplitude, or Mixpanel, to Correlated's outlined fields.
- Note: If you have metrics that do not align with the specific fields, place them under "Custom" as a catch-all.
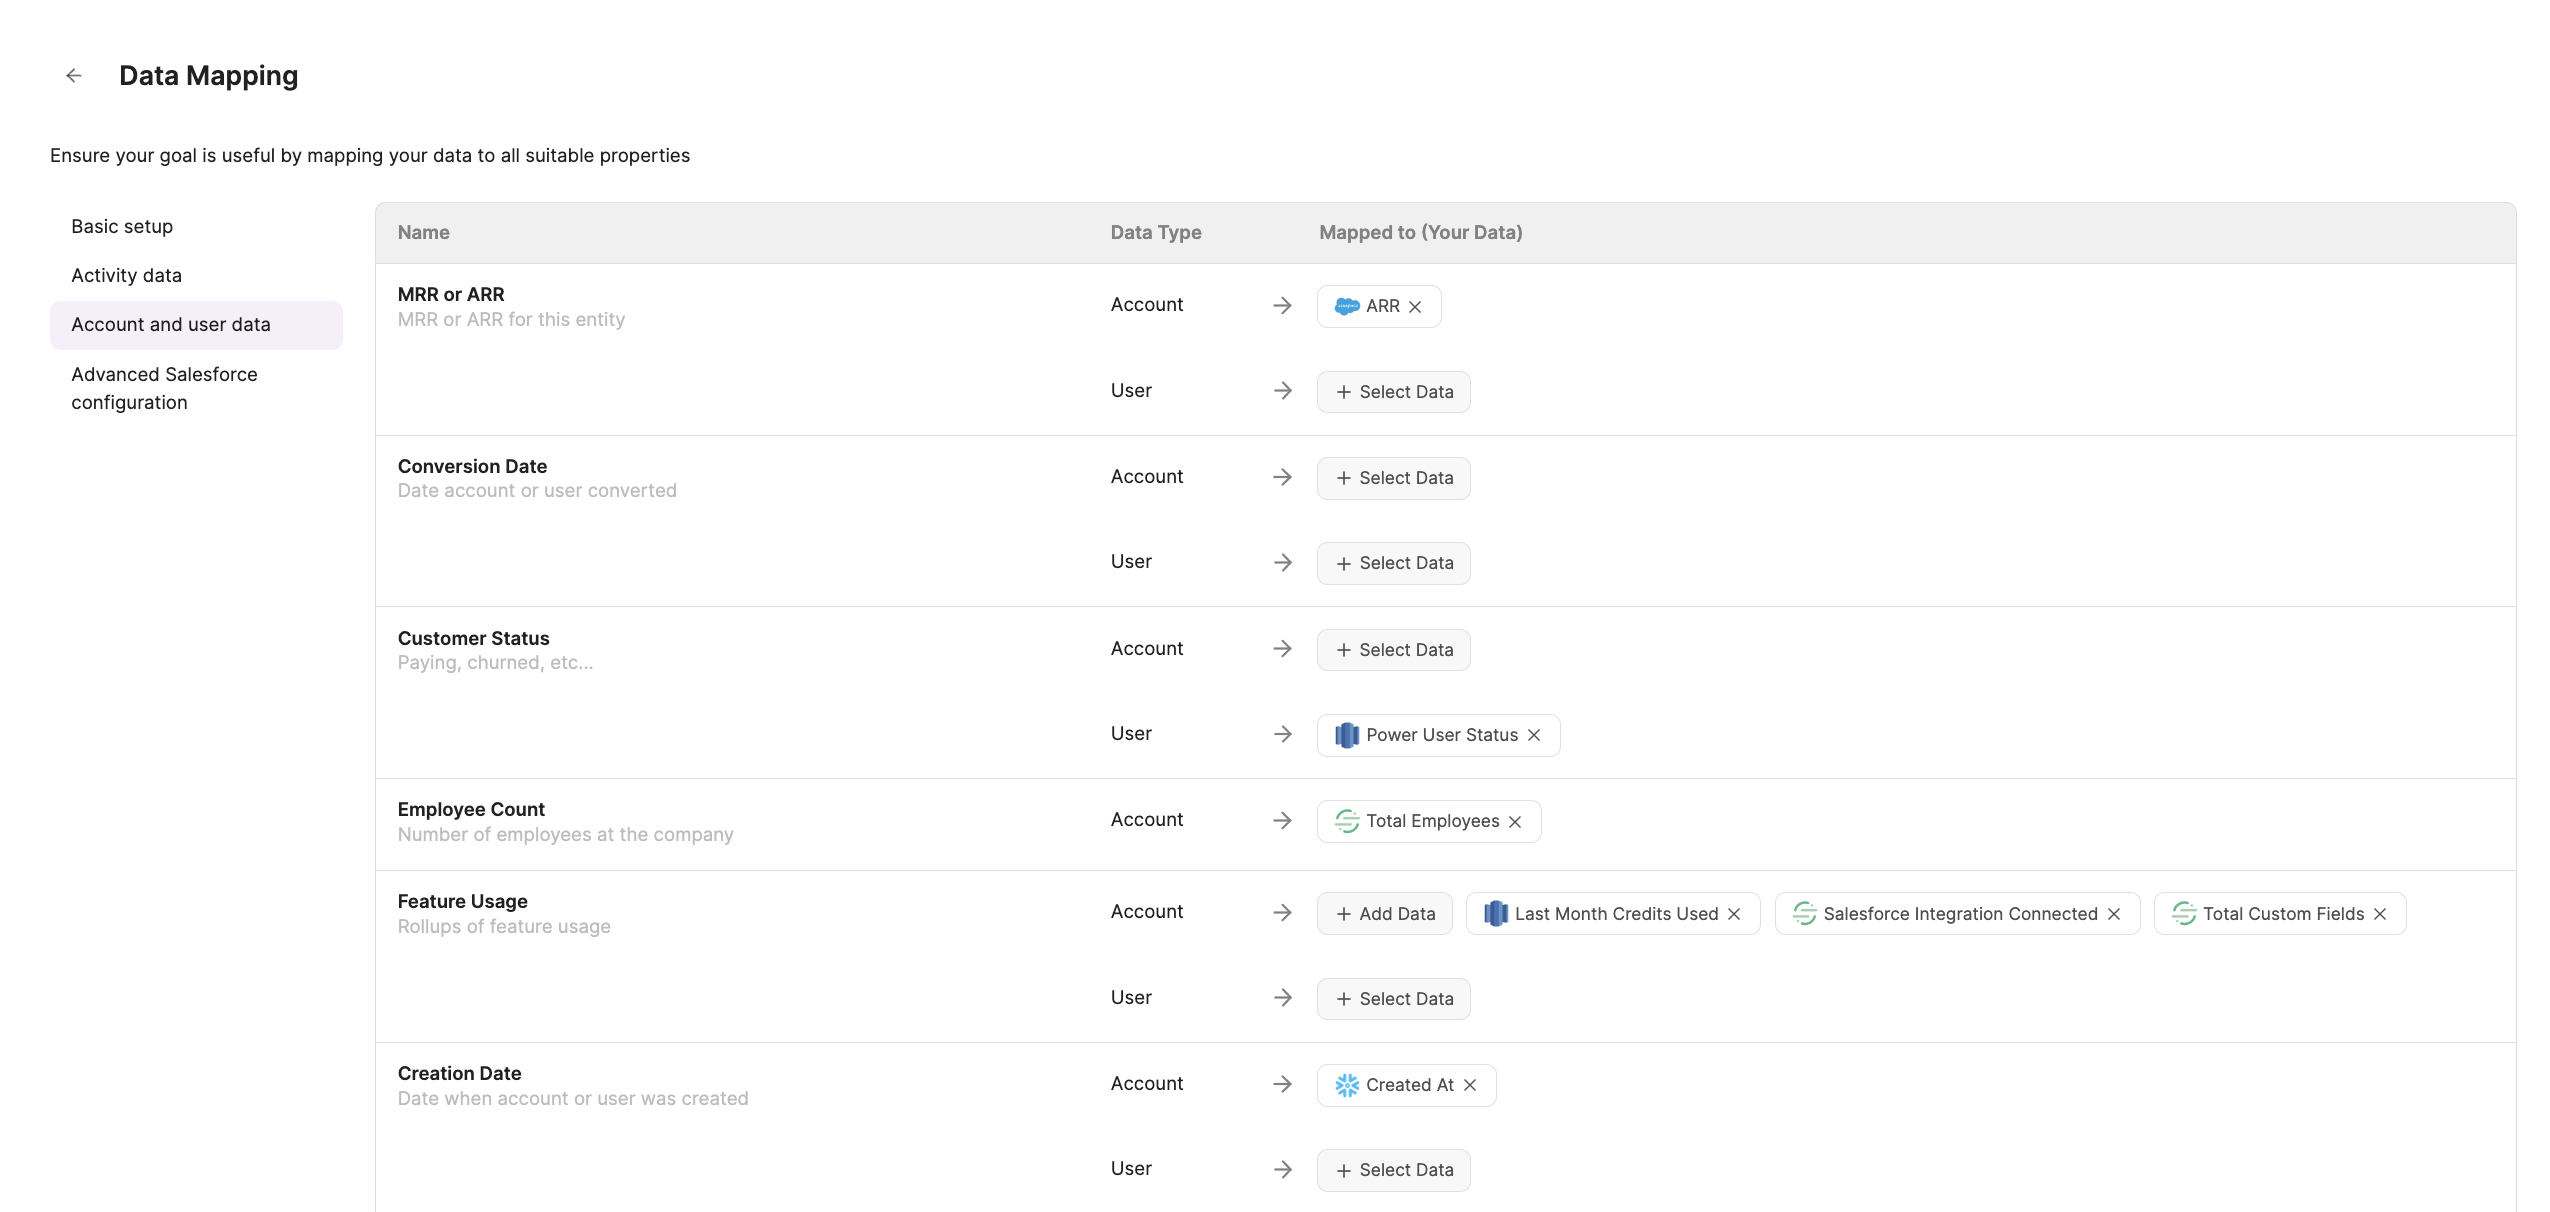
Account and User Data
- Under "Account and user data" is where you must map any Dimensions from data sources like a warehouse or CRM to Correlated's outlined fields.
- Note: If you have dimensions that do not align with the specific fields, place them under "Custom" as a catch-all.
You must complete the "Activity data" and "Account and user data" mappings
Please note that if you are going to use Correlated's PQL Scoring Models, it is crucial to have both the "Activity data" and "Account and user data" mapping sections complete!
The data that is populated here is the data that will be used to power your scoring models.
Note: Even if certain data is mapped here, you can still configure individual models to remove any of this data as you please.
Advanced Salesforce Configuration
- Under "Advanced Salesforce configuration" make sure to input the correct Salesforce Account, Contact, and Lead IDs if you would like to enable either Salesforce Task Creation or Salesforce Object Creation as downstream actions in playbooks.
- Note: As long as you completed the configuration steps when connecting Salesforce, this section should be completed for you.

Ownership Routing
- In the left-hand navigation, click into the "Settings" tab.
- Open "Ownership routing."

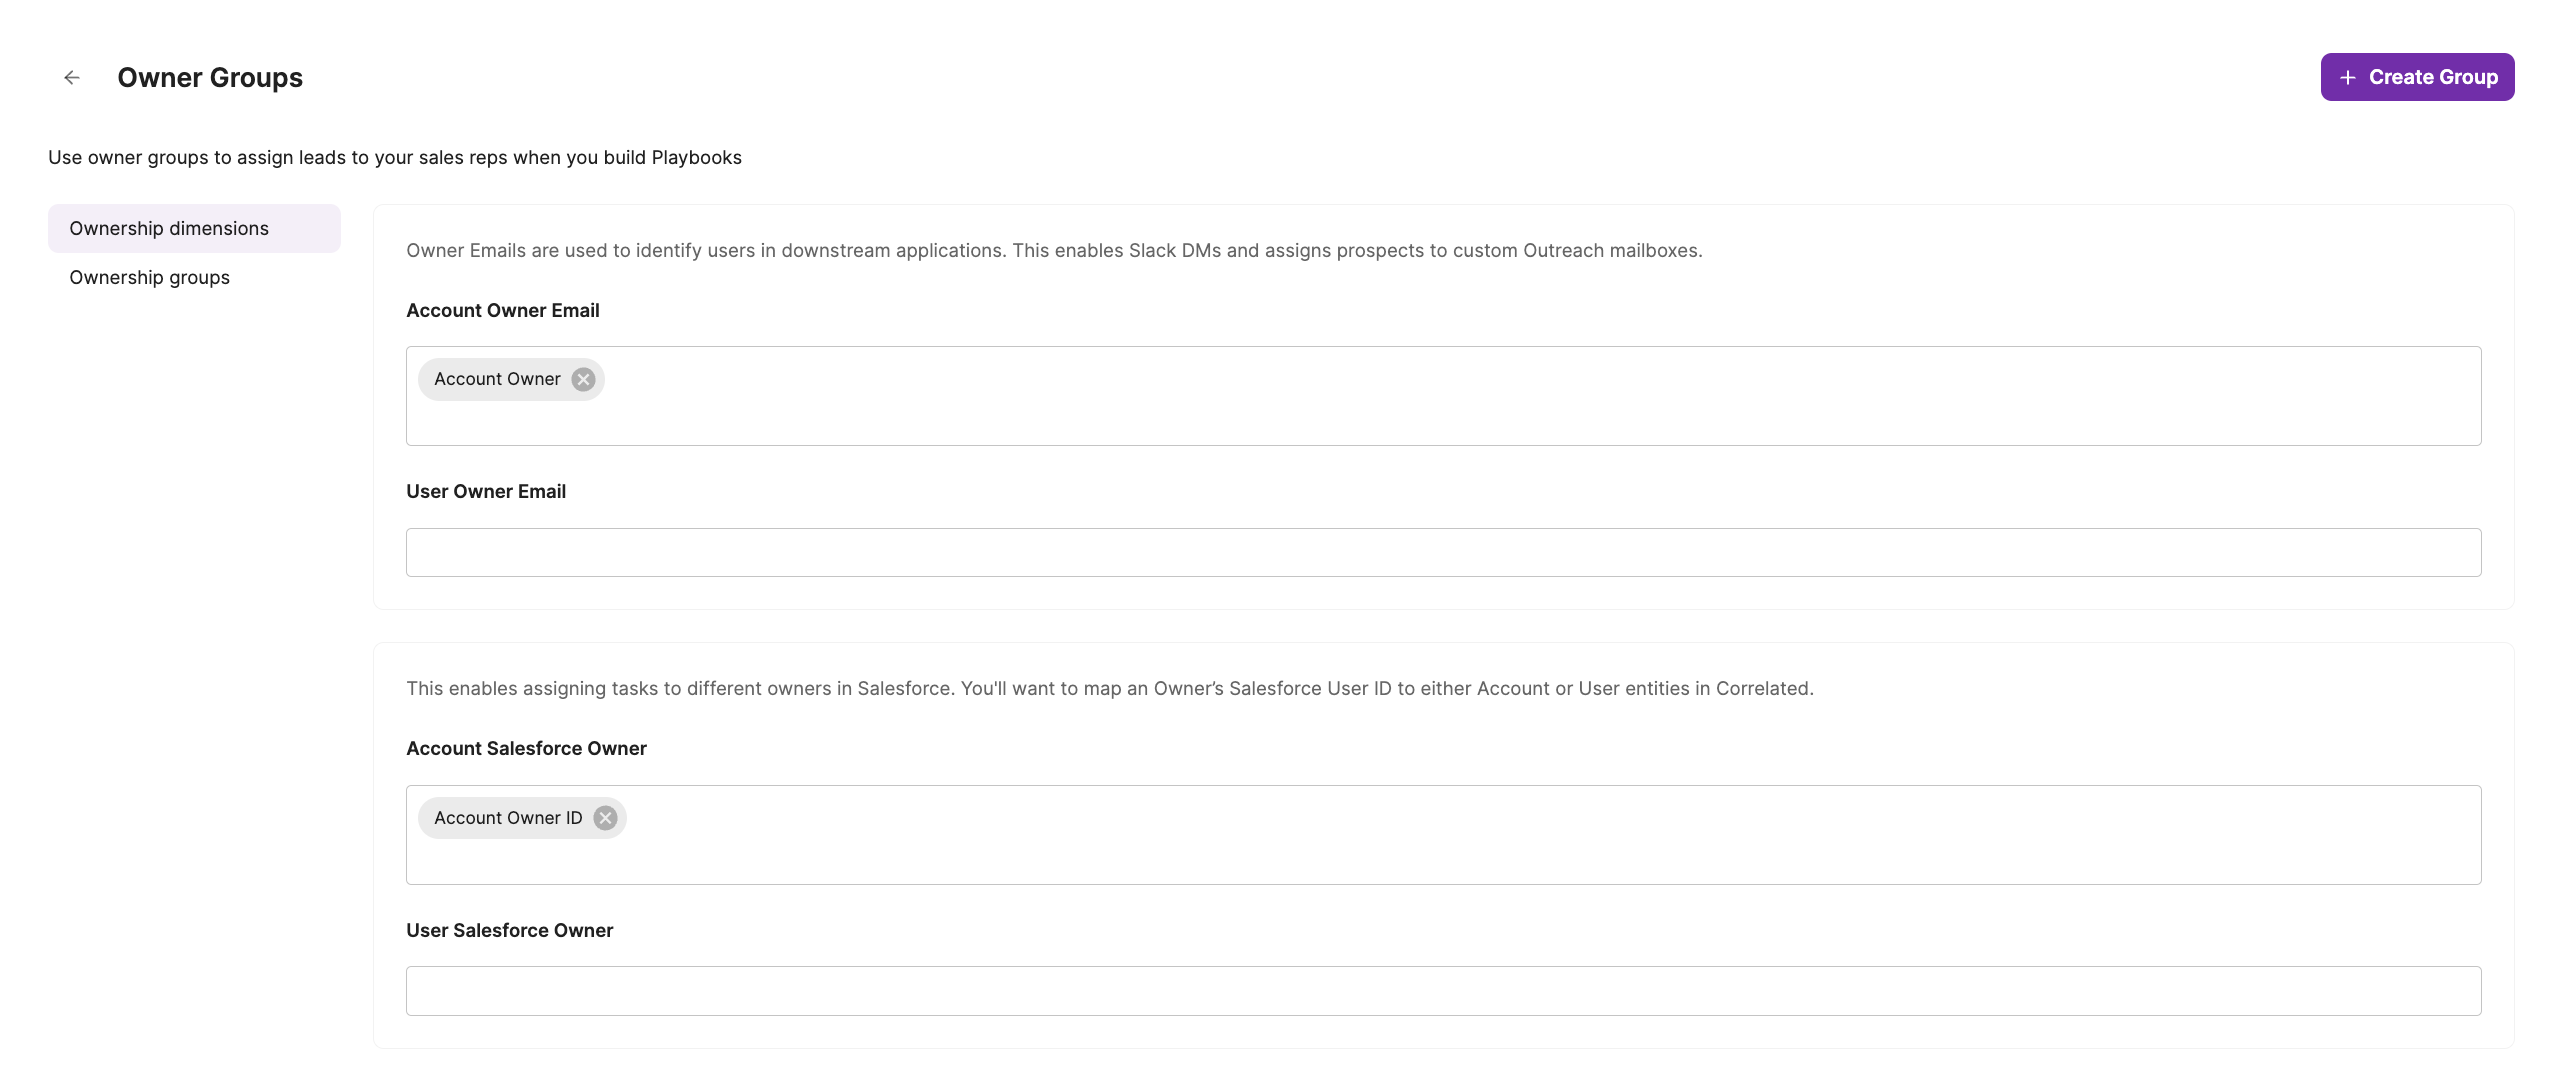
Ownership Dimensions
- Under "Ownership dimensions" you can assign Owner Emails both at the Account and User level, which allows you to send actions such as Slack DMs, Outreach Sequences, and Salesloft Sequences to specific owners/reps. These dimensions MUST be in email address format.
- For example: CSM Owner Email, Onboarding Owner Email, SDR Email
- You can assign Salesforce Owner IDs at the Account and User level. This allows you to assign Salesforce Task actions to different owners in Salesforce. These dimensions MUST be in a SFDC ID format.
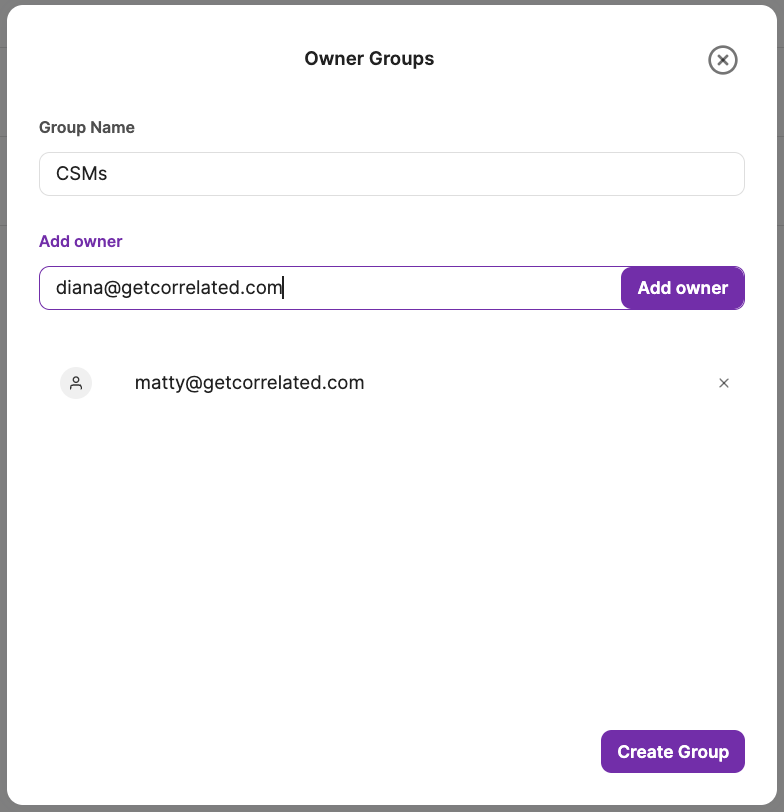
Ownership Groups
Note: This section is completely optional.
- Under "Ownership groups" you have the ability to set up custom groups for round-robin assignment logic in Playbooks.
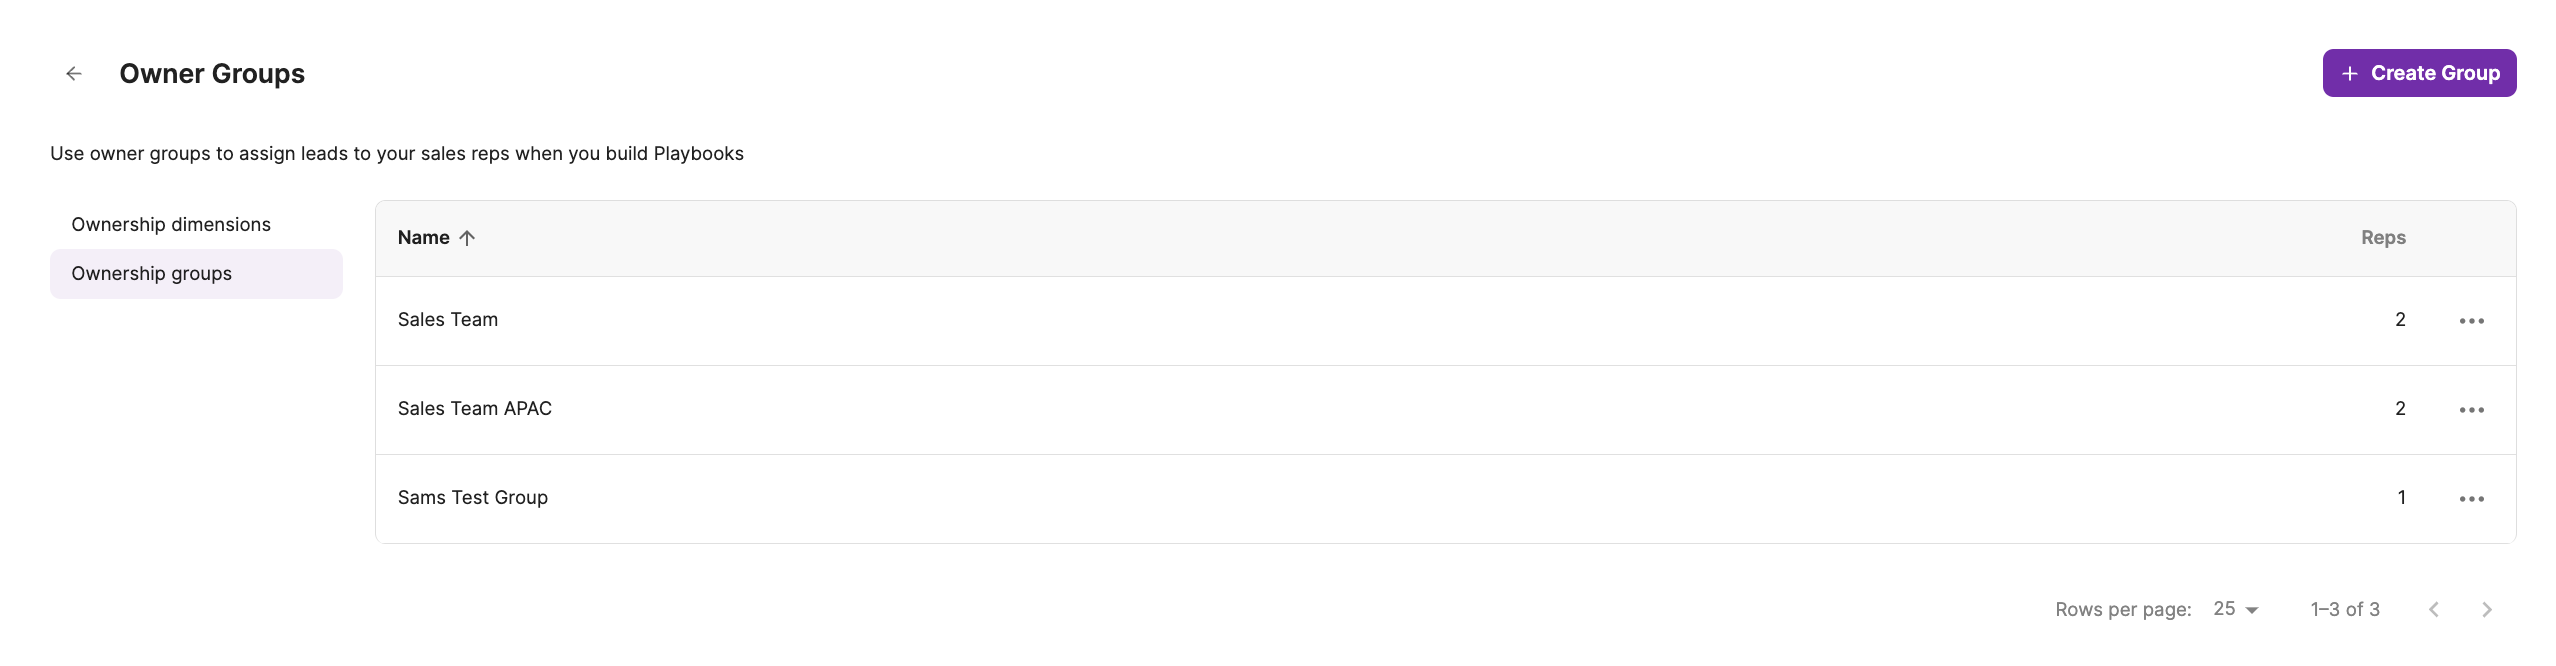
- Just click "Create Group" in the upper-right, and give the group a name (for example CSMs, SDRs, Sales Team, etc). Next, type out all of the email addresses associated with the reps within each group that you want to assign between, and click "Create Group" to save.
- To see how this works in Playbooks, click here.
- Note: You can always edit or delete owner groups later on.

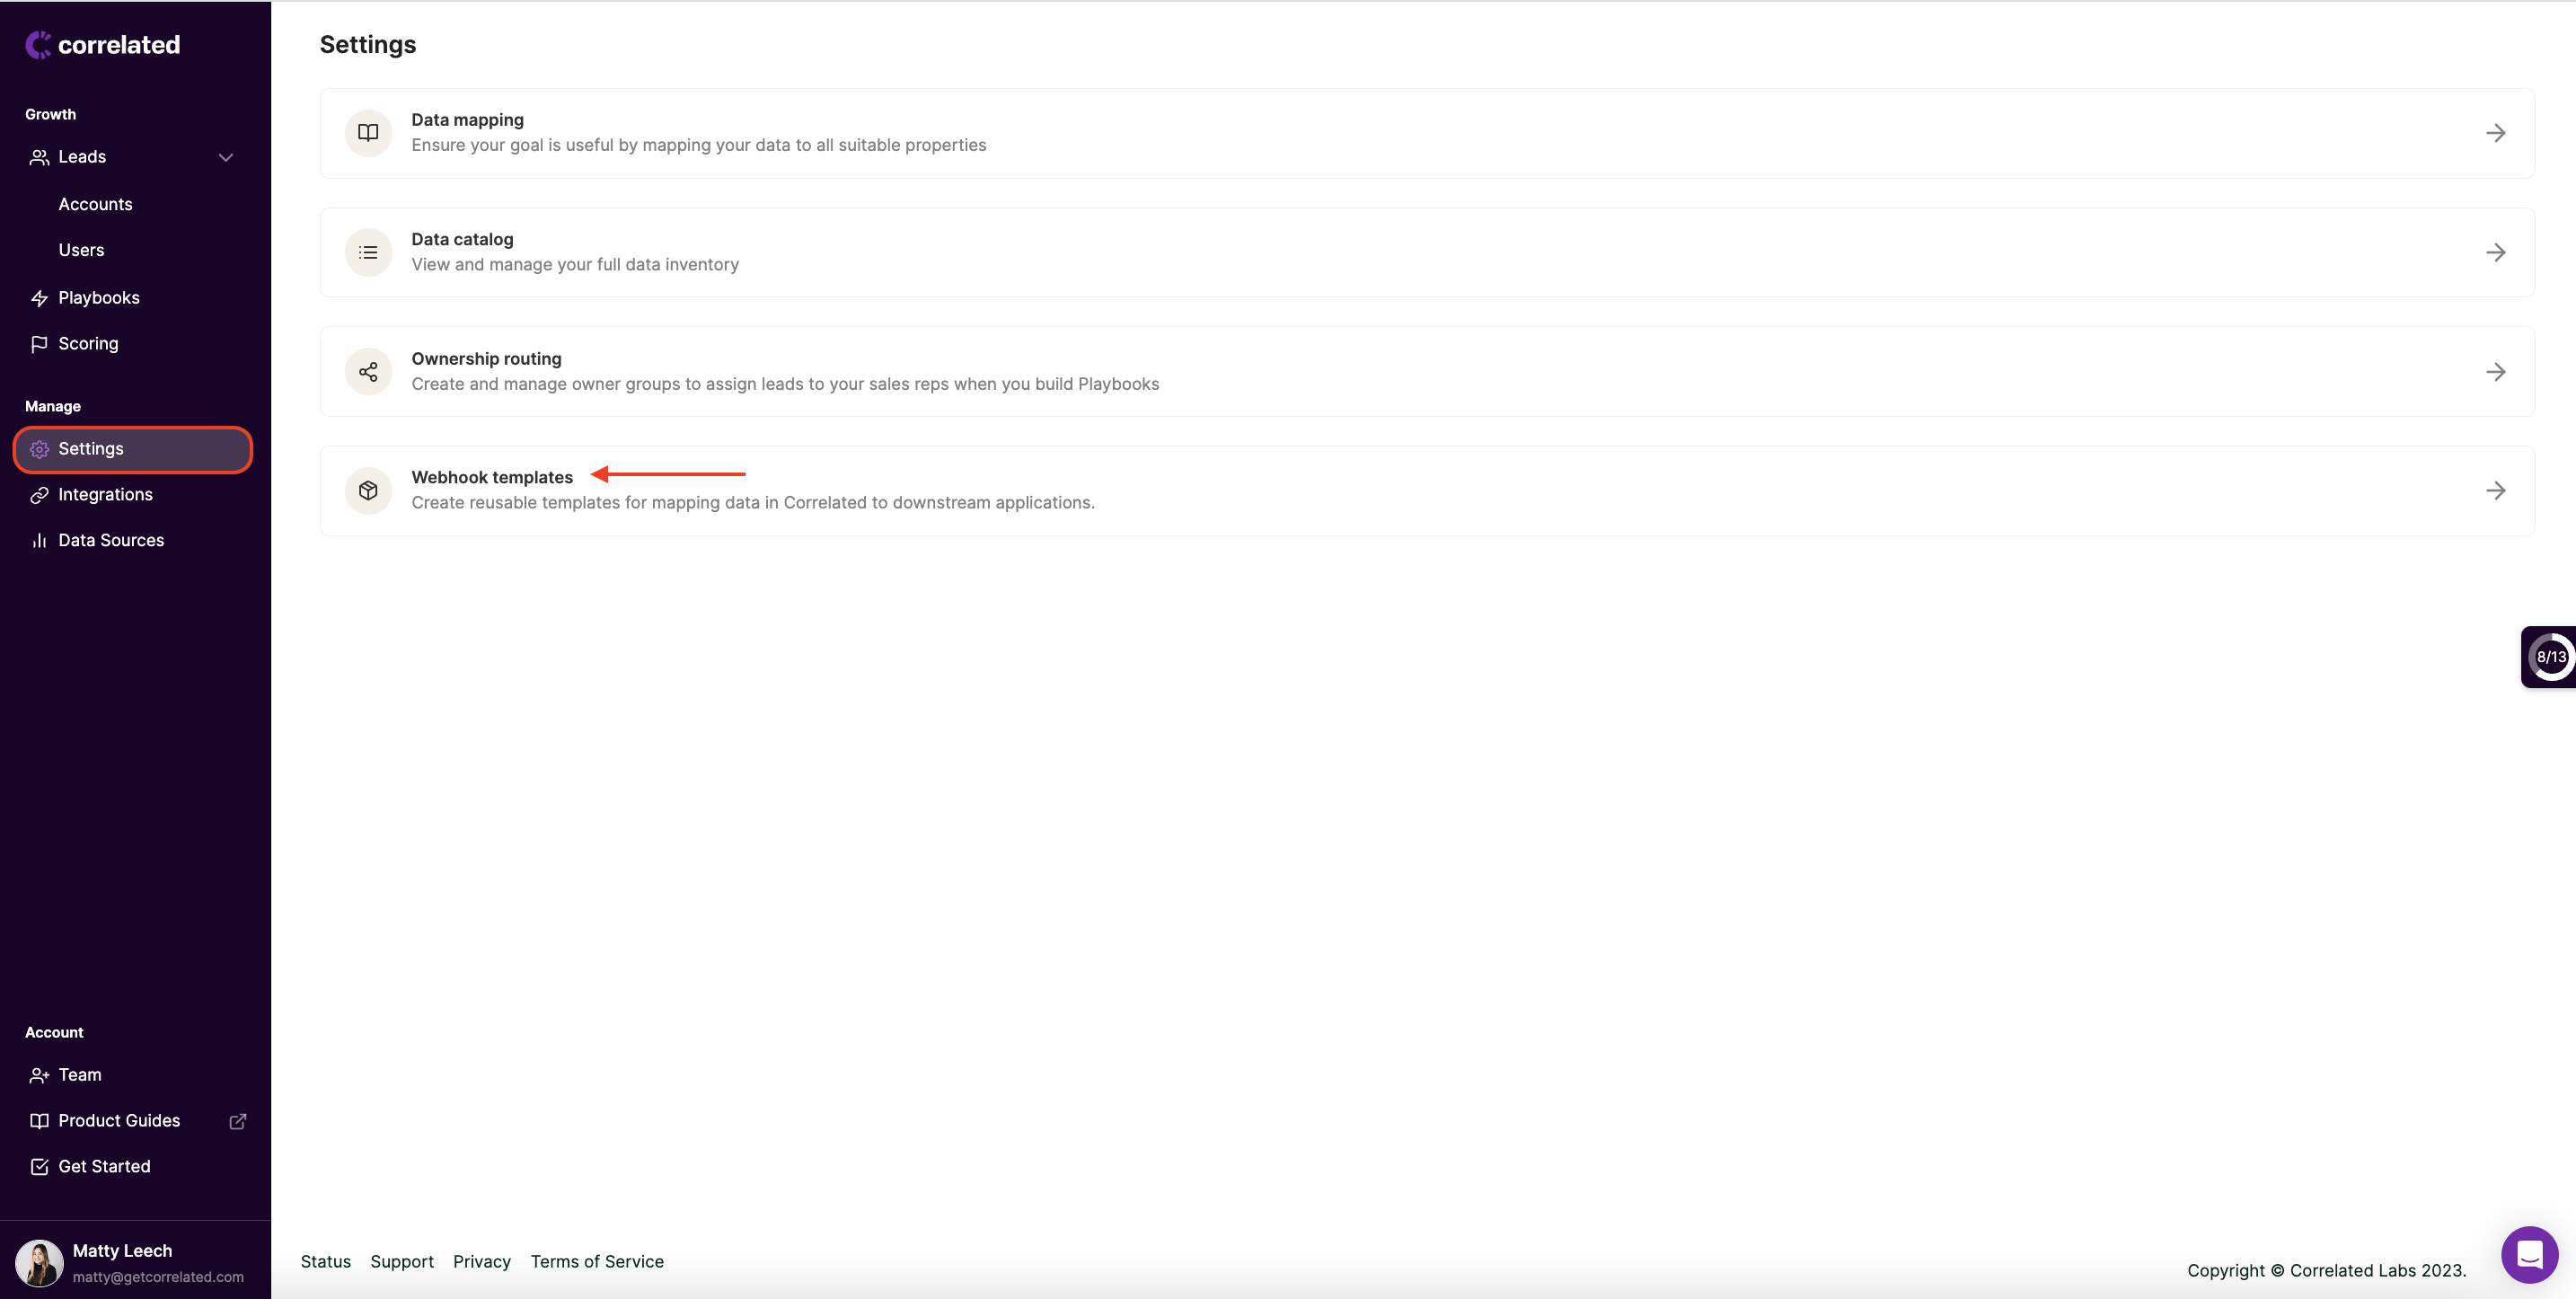
Webhook Templates
Note: This section is completely optional. However, if you will be using the playbook action "Webhook: Add to URL" frequently, it may be useful to create webhook templates.
- In the left-hand navigation, click into the "Settings" tab.
- Open "Webhook templates."
- Click "Create Template." Here, you can create templates containing as many dimensions mapped to fields as you'd like, so that you do not have to map these out every time you add a new webhook action to a Playbook.
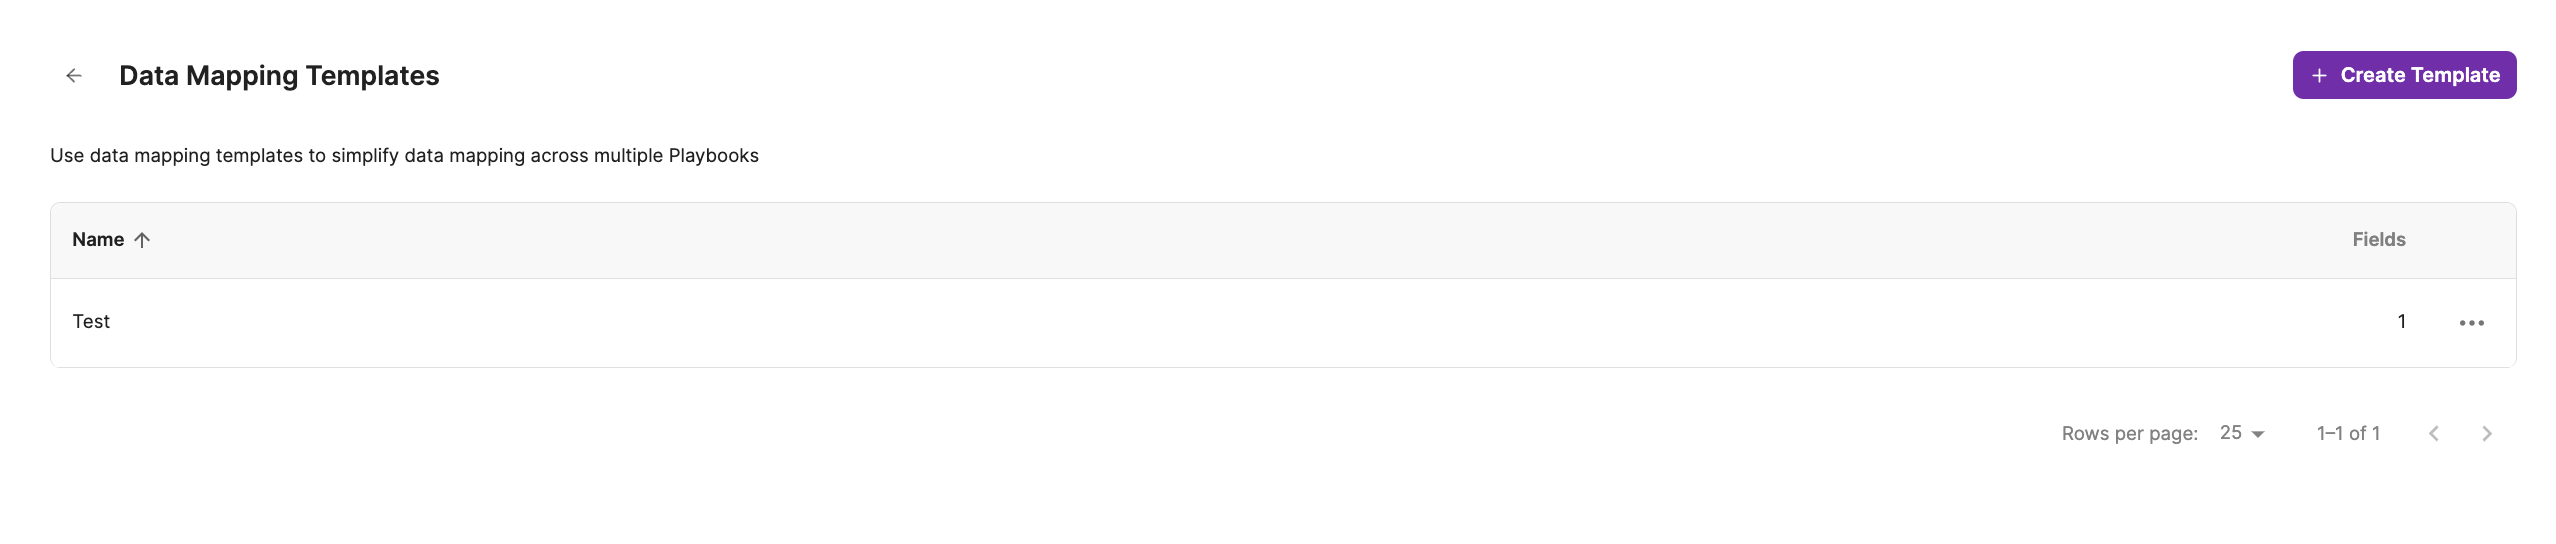
- Give the template a name, select the dimensions you'd like to map over (under Source Field) and fill out the corresponding field names (Destination Fields). You'll be able to select these templates from the webhook action within Playbooks moving forward.

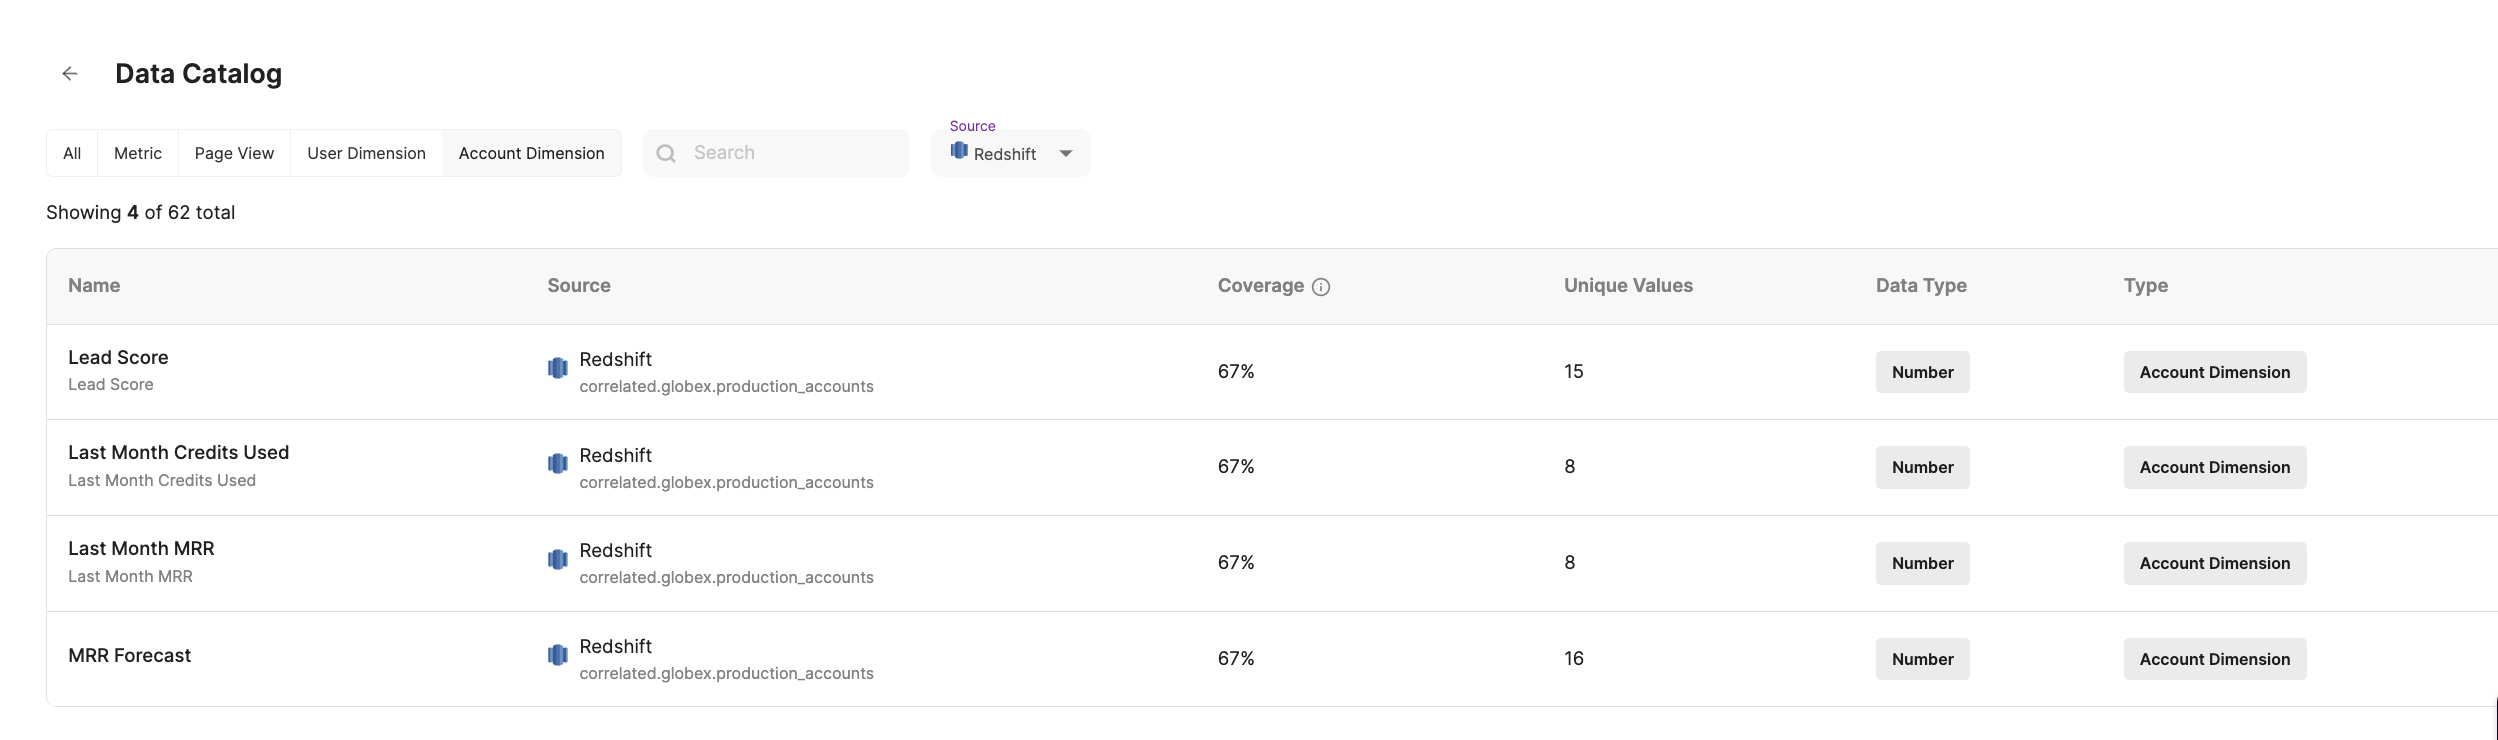
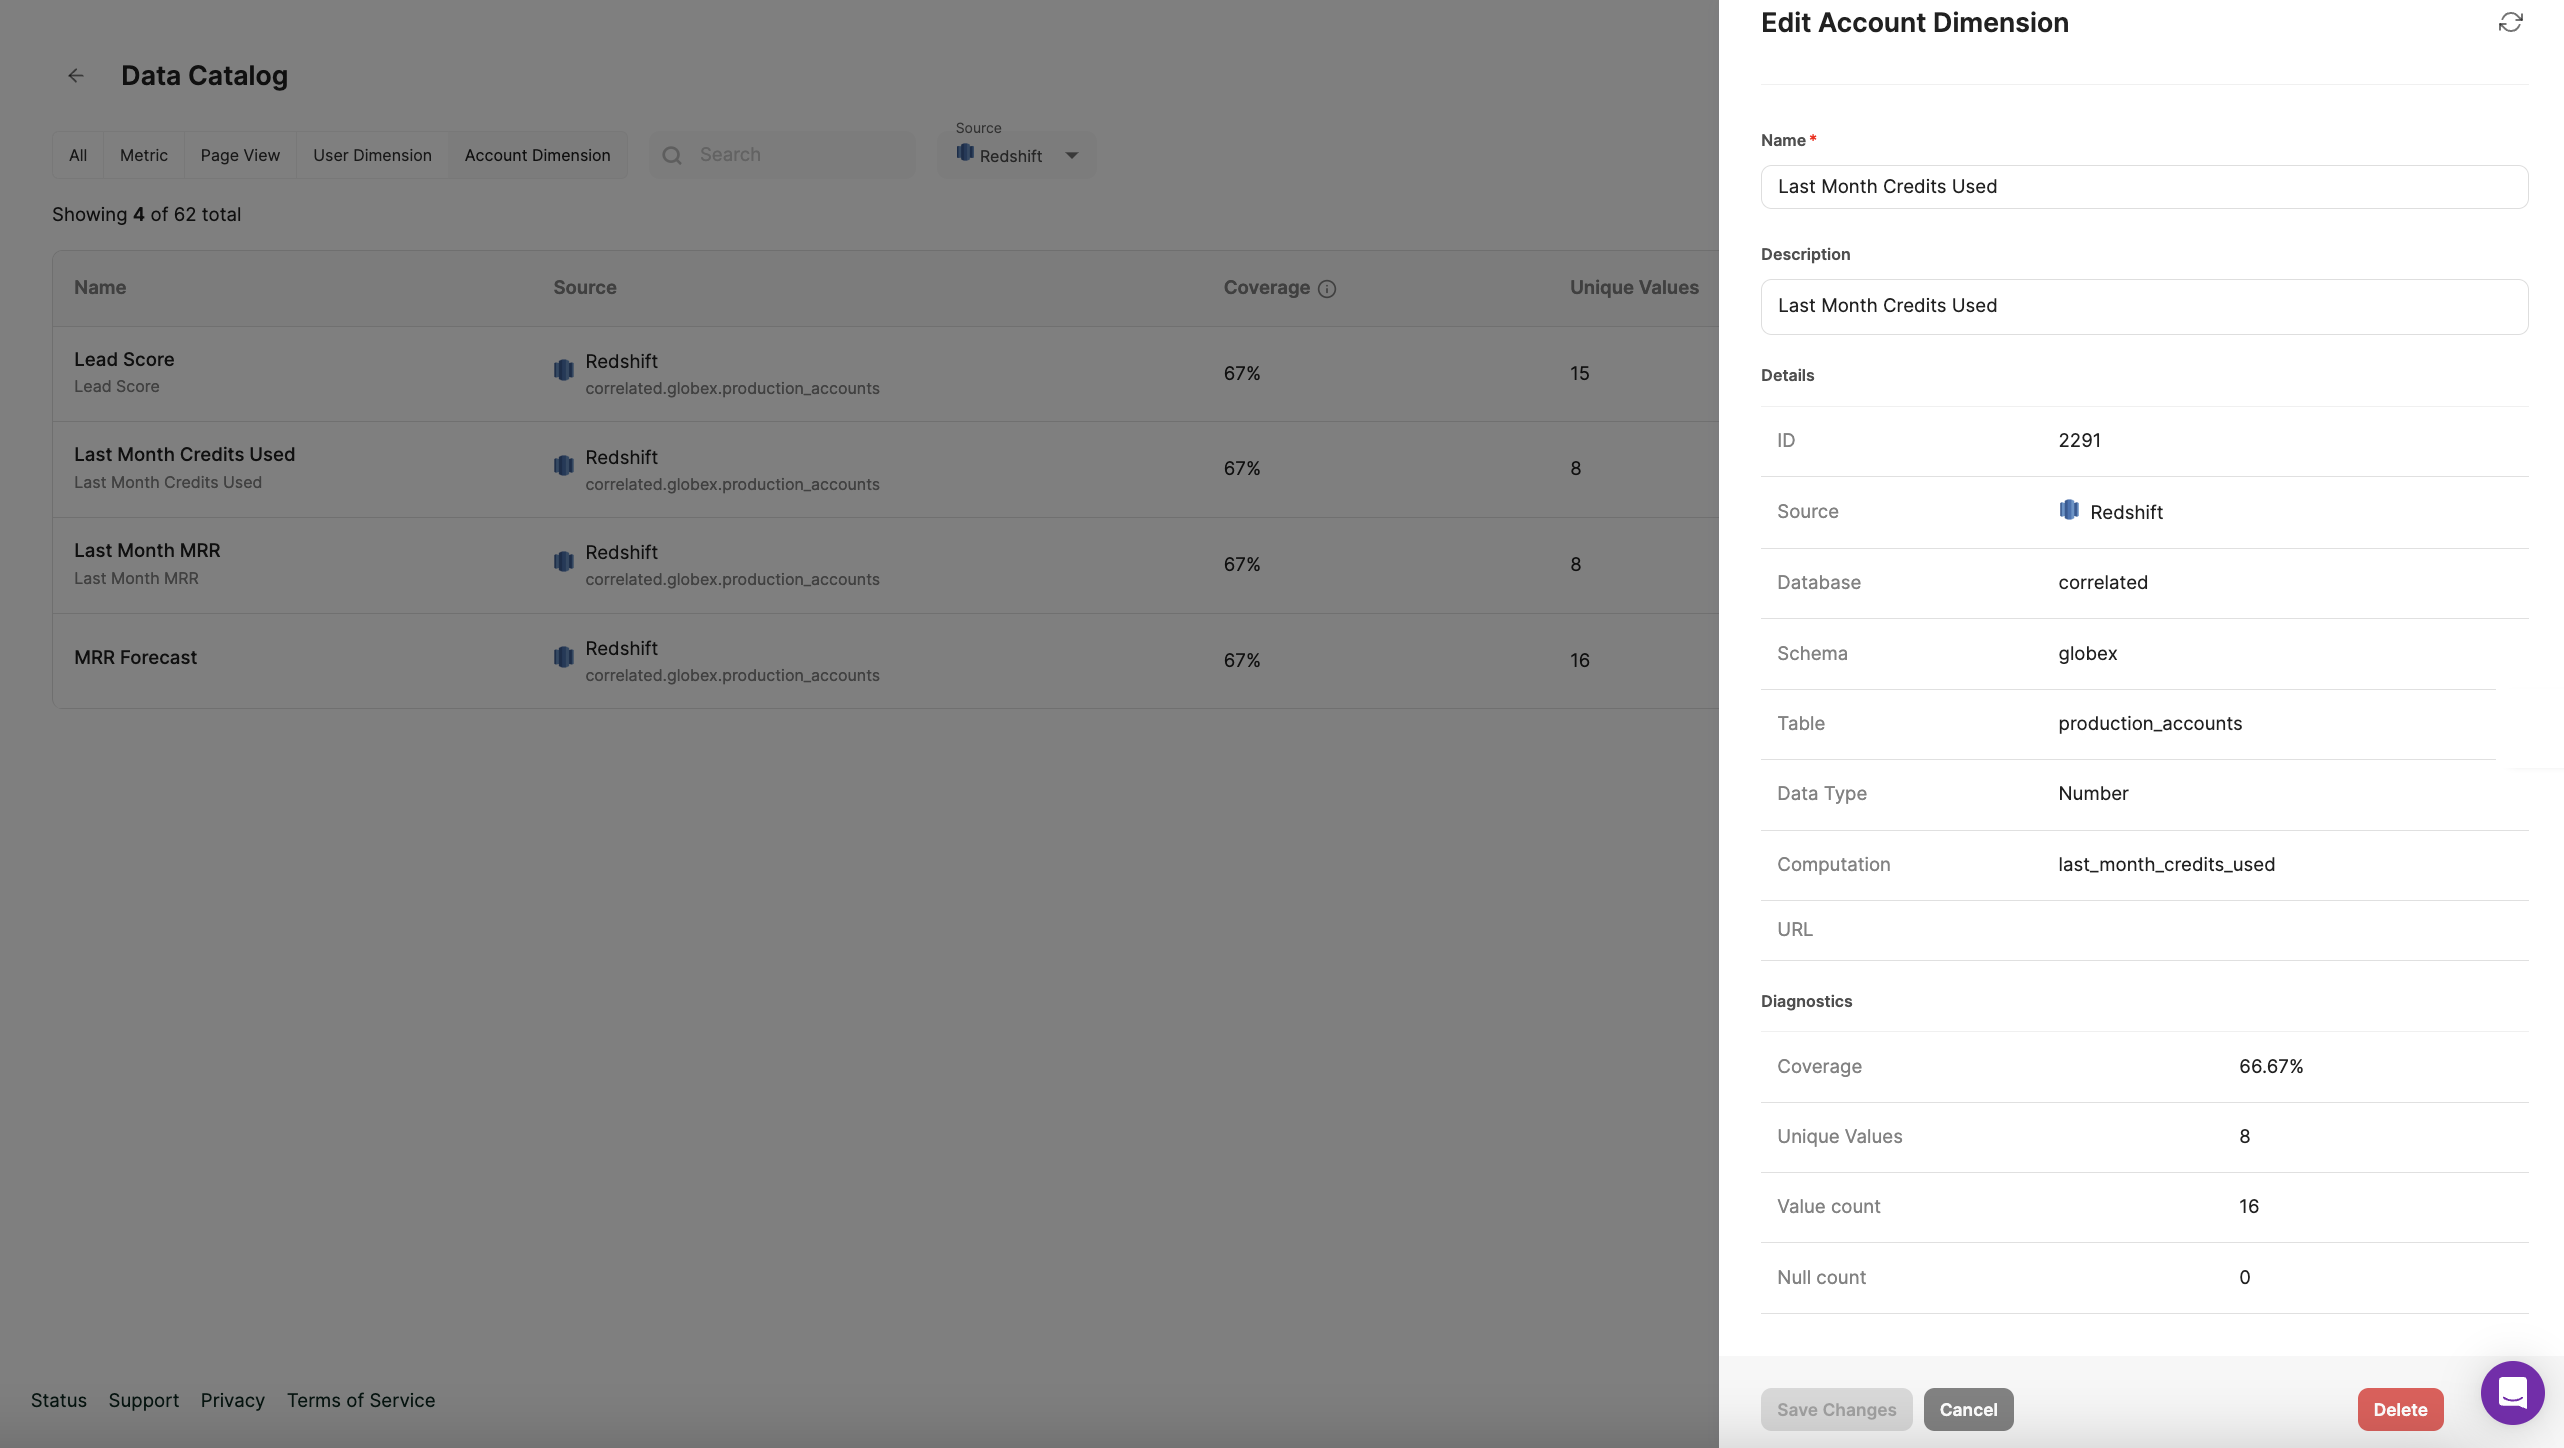
Data Catalog
- In the left-hand navigation, click into the "Settings" tab.
- Open "Data catalog."

- This is a one-stop-shop for all of your data management needs. For any data imported from your sources, you can:
- See all data in Correlated, either filtering by source or searching
- Rename dimensions or metrics in Correlated
- Add descriptions to dimensions or metrics in Correlated
- Delete dimensions or metrics from Correlated
- See coverage (percent of accounts or users who have a value for the given dimension), unique values, value count, and null count
- See important information regarding each data point (what table / schema it comes from, data type, the computation, etc)
Updated almost 3 years ago